skip to main |
skip to sidebar
 DreamFind v1.0
This is the main release page of DreamFind
DreamFind is a Java based free Desktop File Indexer to access the files one needs the most in an easy and fast way.
DreamFind also provides features to open some of the popular websites by opening in the browser using easy to remember shortcuts.
Our computer systems have lot of files and folders but a user generally needs to work only on some of the files and folders based on the requirements. DreamFind helps in accessing those important files and folders by providing a one-window approach and searching in a collection of important files/folders rather than a general search.
The objective of DreamFind is to search a file in the directories/folders important to a user using a auto-updating index of files.
DreamFind also has the feature to filter the results based on Folders, Video, Audio, Documents, Books and Images based on popular file extensions
And yes, its Free and its Fast.
So Do try DreamFind.
It would be great to know how DreamFind has helped you.
Do tell your reviews here or the official Facebook page of DreamFind.
DOWNLOAD FOR WINDOWS DOWNLOAD FOR LINUXSNAPSHOTS1. Initial Screen2. Another screen with results
REQUIREMENTS
DreamFind requires Oracle Java Runtime Environment 1.6 for it to work smoothly.
IMPORTANT
1. If application just does not run, it means you don't have Java Runtime Environment installed. Go to www.oracle.com and download the latest JRE.
USAGE INSTRUCTIONS1. Click the DreamFind icon to open DreamFind.
2. When the DreamFind is opened for the first time, no database of indexed files and folders is loaded. Thus click on 'Settings' to open Settings Dialog box.
3. Here one by one, add the paths of folders to be used for searching by clicking on 'Add' button.
In case, the sub-folders are also needed to be included, click on 'Index subdirectories' then click on 'Add'.
4. Similarly more folders can be added using the the previous step if required.
5. After adding or removing paths, click on 'Scan'.
6. Once the scan is complete, then DreamFind can search a file/folder present in the indexed paths.
7. Also any website can be opened in a browser by typing the url in search field of DreamFind.
8. Check the Help section of DreamFind by clicking on the '?' button to find various shortcuts available.
DOWNLOAD FOR WINDOWS
DOWNLOAD FOR LINUX
This is my first post after a very long time. The reason was that i was in a corporate place from where blogspot signin was not possible, and due to lack of time, i had not much chance to access it outside as well. Its good that now i will be able to post here more often.
Thanks alot for coming here and reading my posts.
Recently i encountered a problem while using Nimbus LAF of Java that i was not able to make components transparent by using setOpaque(false).Though my Java 6 update version is a bit older than the current updated version,
so it might be possible you may not experience this problem.
For my problem, i found out from the Bugs Section of Java website that this can be resolved like this:-JTextArea jTextArea1=new JTextArea1();................................jTextArea1.setOpaque(false);jTextArea1.setBackground(new Color(0,0,0,0));This bug might have been resolved in future updates but if you face problem, you can use this trick.
Few days back, I got an opportunity to review a product of uCertify, known as PrepKit. Prepkits are actually Exam Simulator and Preparation kits, a class of products offered by uCertify, and help in preparation of certification exams conducted by various IT vendors.uCertify offers a vast list of PrepKits covering a big list of Certification Exams which can be instrumental in your career growth. I reviewed the uCertify Prepkit for SCJP(Sun Certified Java Programmer) Certification Exam CX-310-065, and I was indeed impressed by the product. Prepkit is not just a Exam Simulator but also helps in preparing for the Exam because of its large study material present in it. The uCertify product aims to provide a self-graded and Low Pressure environment for the user to prepare, analyze the mistakes and build confidence before giving the actual exam.FEATURES OF PREPKITUser Interface
As I used the product, I felt that Interface of PrepKit is very user friendly and logical. It is neat and logically separated so the user should never feel lost.PrepKit's way of TestingPrepkit offers a good number of Practise Tests which can be taken while preparing for the Exam.
Apart from the regular Practise Tests and the Final Exam which will simulate your actual Exam, there is also Interactive Quiz, Adaptive Test, Custom Test and Fixed Time Test which are actually very interesting.Interactive Quiz is like a normal Quiz but you always like to have it one more time, and the good thing is that it helps in your preparation.
In adaptive Tests, the skill level required for answering the question increases with every question and is a good feature to test your concept level.
Custom Tests can be created based on what you want or the test based on specific concepts. I liked this feature as this way you can get better by concentrating and giving tests made from your weak concepts.
Also if you have some free time, you can have Fixed Time Test to make use of whatever little time you have.The tests can be taken in Test Mode as well as Learn Mode. Learn Mode is a good feature in which you can learn the concept behind a question as you take the test, however I believe this mode should be used in the beginning but as you come closer to the date of exam, it is always better to simulate Exam using Test Mode.
Study Material included in PrepKit However the feature of PrepKit which I noticed to be most attractive is the Study material supporting the Tests. Study material has been made keeping in view the Exam Objectives. By referring to the material, we can get a good idea of what is expected in the Exam. Study Material consists of large number of "Notes, Articles, as well as essential Tips" to complement your preparation. Prepkit also has the Flash Card feature by which one can revise the concepts very easily.Other Noteworthy FeaturesAnother key feature in the product is the "ability to bookmark and tag the questions in the tests" so that one can review and see such questions later. User can also create custom notes to write important points using "My Notes". Prepkit also provides the functionality to discuss your problems with other users using "Discuss it".Using "Test History", the user can also see the results of older tests taken, which is a nice feature to analyze your preparation over a period.
VERDICTAt last, I believe that PrepKit is a good product that will surely help an aspirant to prepare well for the Certification Exams. Use PrepKit wisely to complement your Preparations and you will surely benefit from it.uCertify HomepageClick here for PrepKit for SCJP 6.0 Certification Exam
 WoodCutter v1.0
This is the main release page of WoodCutter
WoodCutter is a Java based file splitter and merge utility. It is a small size and free file splitter that allows a user to split any type of file in smaller sizes. This file splitter is of much use to us in order to send large attachments through mail (where there is a limit of maximum size of attachment) by splitting them in smaller size, and then these split files can be sent by user with great ease.
One can also come up with many other interesting uses of WoodCutter as the need arises in different situations where it is required to split a large file.
WoodCutter offers 3 ways of merging back the original files. WoodCutter creates a merge file which can be processed by the WoodCutter application to join all the files back. In case the receiver of split files does not have WoodCutter installed, then also the original file can be obtained as WoodCutter also creates a batch file and a Shell script file to merge the files back. The batch file will be used in Windows platform and Shell script will be used in Linux platforms.DOWNLOAD FOR WINDOWSDOWNLOAD FOR LINUXSNAPSHOTS1. Initial Screen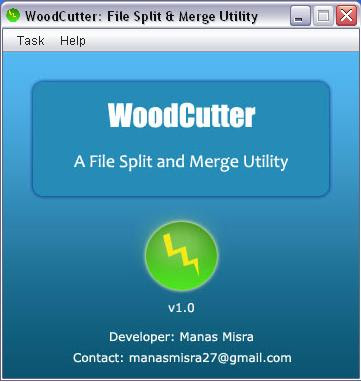 2. Splitting in Progress
 3. Merging in Progress
 REQUIREMENTS
WoodCutter requires Sun Java Runtime Environment 1.6 for it to work smoothly.
Also if your Sun Java Runtime Environment 1.6 is of Update 10 or better, You will see the application work in the latest Nimbus theme.
IMPORTANT
1. If application just does not run, it means you don't have Java Runtime Environment installed. Go to http://java.sun.com/javase/downloads/index.jsp and download the latest JRE.
2 . If application opens but look is different from above snapshots, this means your JRE is older than Update 10, hence if you want above look in the application then again go to the http://java.sun.com/javase/downloads/index.jsp and download the latest Java Runtime Environment.
USAGE INSTRUCTIONS
1. Click the WoodCutter icon to start the Application.
2. To split a file, specify the file using the "Browse" button, then specify the maximum size of each split file.
3. The application will save all the split files in the same location of actual file to be split, however in case you want to save to a different location, the application allows you to specify the desired path.
4. Then click the button of "Start the process of splitting" to split the file.
5. The application will produce the split files, a merge file, a batch file and a shell script file.
6. Application can merge all the files using the merge file produced during splitting.
7. In case you send the split files to a person who does not have WoodCutter application, the person can still create the original file using batch file or shell script file.
8. For Win platform, the person has to double click the batch file to run it and join all the split files. The batch file and all the split files must be present in the same directory.
9. For Linux systems, shell script must be executed with proper permission to join all the split files, The shell script and all the split files must be present in same directory.
10. However in case the receiver has WoodCutter installed then using the application, split files can be joined using the "merge" file.
11. Thus it is important that in order to join all the split files, it is required to have batch file or a shell script file or merge file as the case maybe.
DOWNLOAD FOR WINDOWS
DOWNLOAD FOR LINUXCONTRIBUTIONSThough the software is freeware and can be distributed freely, development costs both time and money. Hence if you have liked the efforts put in developing it or have liked the software or in case the software has helped positively in the productivity of your organization, Consider contributing some money to assist the development.


